This tutorial shows how to use django-bitcoin to receive and send money in your Python + Django application. The walkthrough guides how to create a bitcoin wallet in your Django application, buy bitcoins, transfers bitcoins into your application and then spend them. This all is done interactively from the command, Django shell and Python prompt.The tutorial was tested on OSX. It should work on Linux unmodified. On Windows you are on your own.
django-bitcoin is a proven open source solution for handling bitcoins in your service. However, it might be rough on the edges, it is being actively developed and lacks satisfying documentation. If you need a helping hand to set it up please pop up on #localbitcoins-chat on irc.freenode.net or poke me by email.
The tutorial Django application code is available on Github. It was originally presented in PythonBrazil 2013. The tutorial code is MIT licensed and uses my personal fork of django-bitcoin. Disclaimer: I work with the related projects.
LocalBitcoins is hiring. LocalBitcoins is currently looking for fraud analyst, growth hacker, international support people and software developers.
Table Of Content
1. Why accept bitcoin in your online service
6. Purchase some test bitcoins
1. Why accept bitcoin in your online service
- Bitcoin is money with API: very easy to handle programmatically. You can do it even from UNIX command line.
- No upfront contracts or paperwork needed. Bitcoin works in every country.
- Bitcoin market liquidity has risen to a level, so that it is easy for everyone to obtain bitcoins from LocalBitcoins.com. You can also convert bitcoins easily back to fiat currency, when you need to pay taxes.
- It is free from chargeback fraud. The system is based on mathematics instead of trust.
- Very low transactions fees
- Everybody hates PayPal
Prerequisites
In order to understand this tutorial, you need to have basic understanding of
- Python 2.7
- virtualenv
- memcached
- bitcoind
- Django basics: how to configure Django project, MySQL, models, South migrations, using interactive Python shell.
- How to consume piles of open source code from Github
Installation
Setup and configure memcached first.
Installation (virtualenv based):
git clone git@github.com:miohtama/django-bitcoin-example.git
cd django-bitcoin-example
virtualenv venv   # Create virtualenv folder caller venv
. venv/bin/activate  # Active virtualenv
Install Python dependencies using pip:
pip install -r requirements.txt
Tutorial walkthrough
django-bitcoin creates a so called bitcoin web wallet in your Django project.
- You need to have a bitcoind installed on your desktop / server where you run the tutorial.
- django-bitcoin reads transactions from bitcoind and duplicates them as Django data with convenient models to handle them in your application
- django-bitcoin can send bitcoins from the system by calling bitcoind interfaces
2. Configuring bitcoind
Install bitcoind.
Note that the bitcoind installation takes hefty 10-20 GB disk space for the block chain data. Blockchain contains all transaction history of bitcoin ever. bitcoind downloads this data from the bitcoin network and it may take a while.
- django-bitcoin communites with bitcoind over JSON-RPC protocol. You set the bitcoind address in settings.py
- bitcoind transaction handling is done as polling, using Django management commands
Configure your bitcoind to accept connection with username and password.
Create file example/localsettings.py and let’s put there in confidential settings (not stored on Github):
BITCOIND_CONNECTION_STRING = "http://miguel:passwor@example.com:8332"

# How many bitcoin network confirmations are required until django-bitcoin considers the transaction
# as received
BITCOIN_MINIMUM_CONFIRMATIONS = 1

# Use Django signals to tell the system when new money has arrived to your wallets
BITCOIN_TRANSACTION_SIGNALING = True
3. Initializing database
django-bitcoin uses South for its schema management. Create a database (sqlite test.db file by default):
python manage.py syncdb
python manage.pt migrate django_bitcoin
4. Do a test run
Let’s open the development web server and see that the Django admin is up with django-bitcoin:
python manage.py runserver_plus
Visit http://localhost:8000/admin to see the Django admin interface having addresses, wallets and such:

5. Creating a wallet
A wallet, django_bitcoin.models.Wallet, is a combination of receiving and sending bitcoin addresses and stores the bitcoin value associated with these addresses. A wallet can have infinite number of sending and receiving bitcoin addresses.
Bitcoin addresses can be created and used on demand. The sending and receiving addresses do not have relationship between them. When you receive bitcoins to your system they do not leave out from the same address. This is who most bitcoin web wallets behave.
Let’s start interactive IPython prompt:
python manage.py shell_plus
Then we create a wallet with an label. Usually if the application has only one wallet (not per user wallets) you call this wallet instance to master wallet:
master_wallet, created = Wallet.objects.get_or_create(label="master_wallet")
Then we need to have an receiving bitcoin address where this wallet can receive bitcoins and then print it out for us:
recv_address = master_wallet.receiving_address(fresh_addr=False)
print recv_address
Write down the bitcoin address you got as we are later sending bitcoins into it.

6. Purchase some test bitcoins
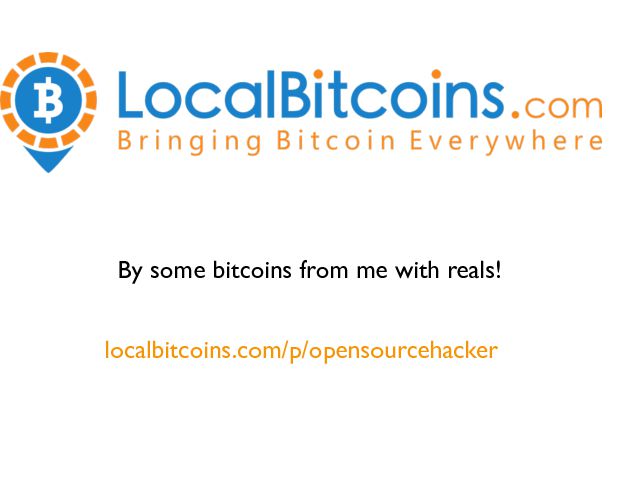
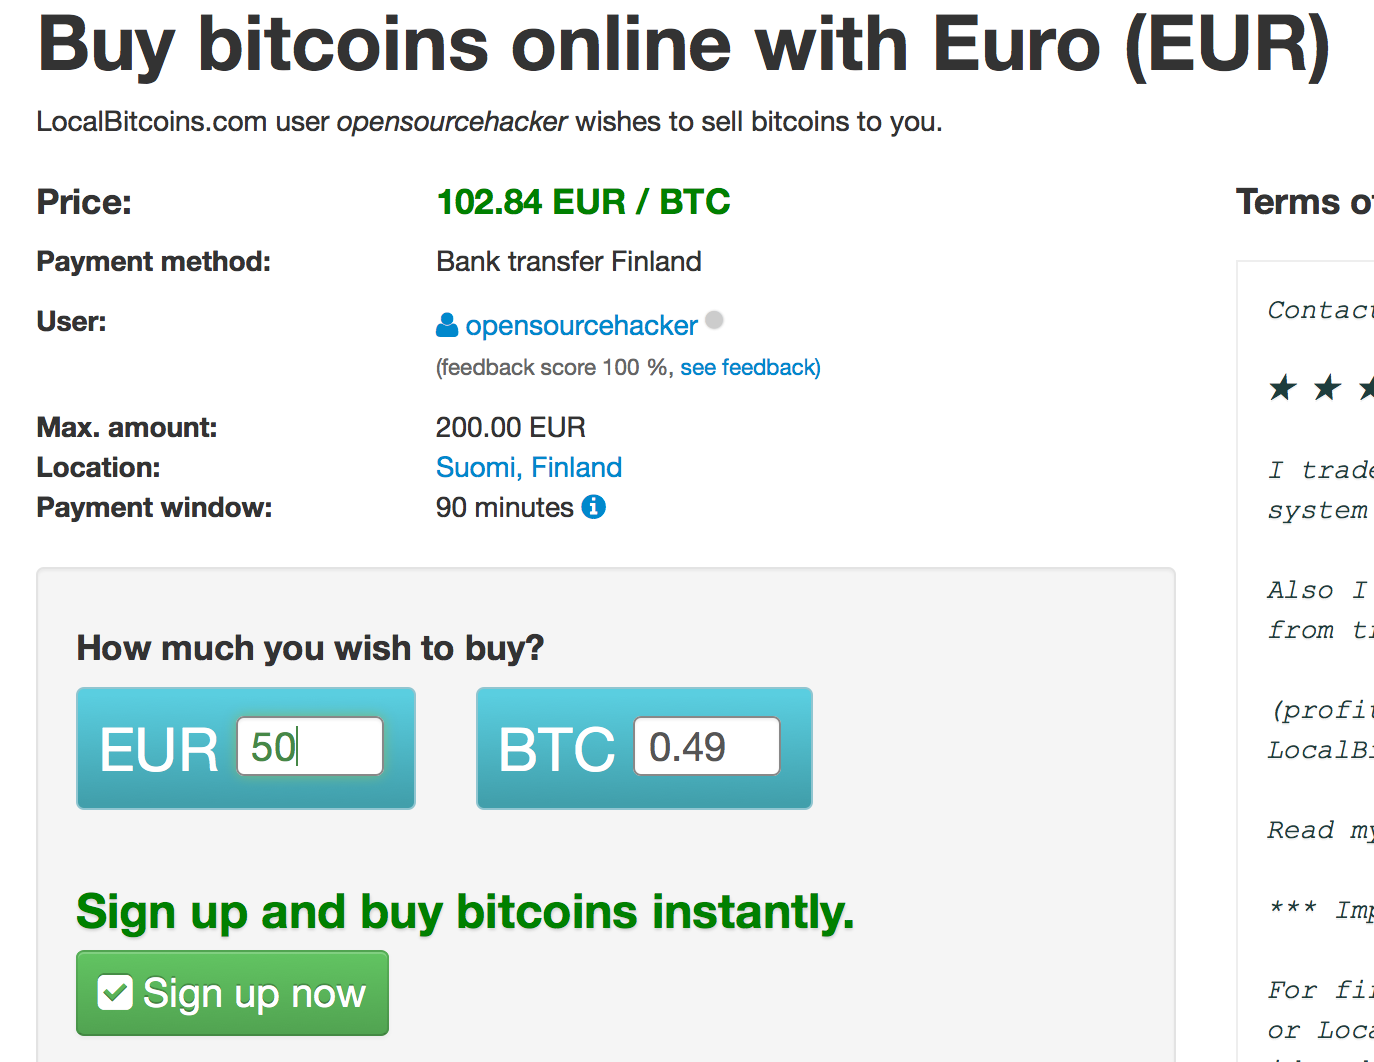
Go to LocalBitcoins.com and buy some bitcoins. LocalBitcoins.com is a person-to-person bitcoin exchange where you are not buying bitcoins from an organization, but from other users. This is easy and fast way to obtain your first bitcoins, as there is no cumbersome verification processes you need to undergo in centralized bitcoin exchanges. Think LocalBitcoins as eBay of bitcoins.
LocalBitcoins.com provides different online payment methods. The recommended methods are:
- Cash deposit (popular in US)
- National bank transfer
If you are living a big city you can also try cash trade.
You can buy small amounts of bitcoins from me. I can also sell bitcoins on PayPal on a request.
7. Accepting incoming transaction
We have the receiving bitcoin address of our master wallet from before. Now we are going to send the bitcoins there from LocalBitcoins:
 When you hit the Send on LocalBitcoins.com, the site submits the transaction to the bitcoin network. Bitcoin network consists of nodes which will confirm your transaction. After the certain transaction confirmation threshold is exceeded you can assume the transaction was safe and not double spent attempt. Usually this confirmation threshold is six confirmations, but you can set it lower if you want to have faster customer experience. It takes 5-30 minutes to process a transaction with six confirmations.
Now, in our own example application polls bitcoind which listens to bitcoin network. bitcoind exposes a bunch of commands over JSON-RPC protocol. You can call these commands even from the UNIX command line.
We have a Django management command for polling bitcoind. On each poll, we check the incoming transaction for receiving bitcoin addresses we have in our database. When the bitcoin network keeps confirming our transaction, the confirmation count of the transaction increases. When the threshold is exceeded, django-bitcoin writes down the transaction to the database as DepositTransaction and the amount of bitcoins in the wallet is increased.
For this example we run the polling command by hand. Usually this is a task delegated to Celery task scheduler:
python manage.py CheckTransactions

8. Checking the balance
CheckTransactions fires the Django signal handlers notifying the Django project for incoming transactions. For the simplicity, we do not use Django signalling in this example. Instead, we manually run CheckTransactions and after 20 minutes and see that the bitcoins have been received in our wallet:
python manage.py shell_plus
master_wallet = Wallet.objects.get(label="master_wallet")
print master_wallet.total_balance()

9. Spending the bitcoins
Now, we got the coins! Time to make some purchases. We go to an online shop selling high quality Brazilian music.
Then we’ll send the bitcoins from our wallet to buy this wonderful piece of art (the screenshot below is a mockup and not an actual store).

All bitcoin amounts are stored in Python decimal.Decimal instead of floats to avoid floating point rounding errors.
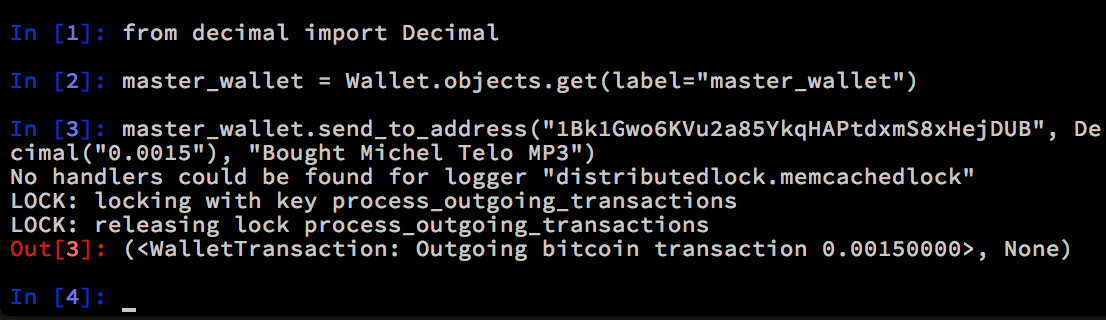
We fire up the Python shell again and send the bitcoins to the target address:
python manage.py shell_plus
from decimal import Decimal
master_wallet = Wallet.objects.get(label="master_wallet")
master_wallet.send_to_address("1Bk1Gwo6KVu2a85YkqHAPtdxmS8xHejDUB", Decimal("0.0505"), "Bought Michel Telo MP3")
Note that for every outgoing transaction there is a bitcoin network fee to compensate the bitcoin miners for confirming your transaction. The network fee is configured to be 0.0005 BTC in django_bitcoind by default. So the total amount to be send is the checkout price + network fee. Higher the paid network fee, faster the transaction is processed by bitcoin network.
10. Checking outgoing and past transactions
We can check the outgoing transactions from our wallet:
for t in WalletTransaction.objects.filter(from_wallet=master_wallet):
   print t, t.to_bitcoinaddress

If you enter the receiving address to blockchain.info you can see your transaction statuses in the bitcoin network.
 And that’s it!
 Subscribe to RSS feed
  Follow me on Twitter
 Follow me on Facebook
  Follow me Google+